

Why so many blankets for Shoulder Stand?
My student teachers often ask why Shoulder Stand isn’t taught more frequently. The answer is probably because it requires a lot of time and effort to do it correctly. Salamba Sarvangasana is a challenging pose to teach to safely. The teacher needs to understand the proper body mechanics and range of motion of the neck and then needs to teach the proper folding and use of blankets and belts to do the pose. There is also a level of studentship, called adikara in Sanskrit, where the student has to take responsibility for following directions and using the props. Some students don't want to take the time to get all of the props and use them correctly; they just want to do the pose.
However, the normal range of motion for the neck is only 45 degrees. If you were to do Shoulder Stand without blankets, it would require the neck to bend 90 degrees, double what it can normally do. This would put a lot of strain on the last cervical vertebrae and the first thoracic to get those extra degrees of flexion. This is not good for the discs in the neck. We use blankets in Shoulder Stand to make up the difference for the degree of available neck flexion and trying to get the body to be vertical in an upside-down version of Tadasana. That way the neck is supported in its normal range of motion.
Here is a picture of me standing in an upright version of Shoulder Stand. As you can see, my neck is bent to its maximum range of motion and it is nowhere near 90 degrees to my torso. Notice my hands are on my back with my elbows as high as my shoulders.

"Upside Down" Shoulder Stand
If you turned me upside down, as I would be in regular Shoulder Stand, you would have to make up the difference between the tops of my arms and the back of my head. This is where the blankets come in. They raise the floor under my arms so that my neck is not over-flexed.

The black line represents the floor. The two arrows represent the difference in height between the floor and my upper arms. The discrepancy between the height of the elbow and the shoulder gets equaled out under the weight of the body.
The blankets have to be folded precisely so that the height of the blanket is consistent from my shoulders to the tips of my elbows. This gives me a firm platform to balance on. The other thing is that my upper arms need to be on the sticky mat with no fabric between my skin and the mat. Fabric tends to be slippery and the skin slides on it. This would cause the elbows to wing out and then the pose would collapse onto your upper back. Also, if you raise the arms up with the blankets, you need to raise the floor so that the buttocks are at least the same height as the blankets. That makes it easier to go up and come down.

Blanket set up for Shoulder Stand
Here is what Shoulder Stand would look like if you did not use blankets. Since you cannot safely bend your neck 90 degrees, your torso would be angled backwards and your legs would be counter balanced forward. This causes your posture to be "piked".
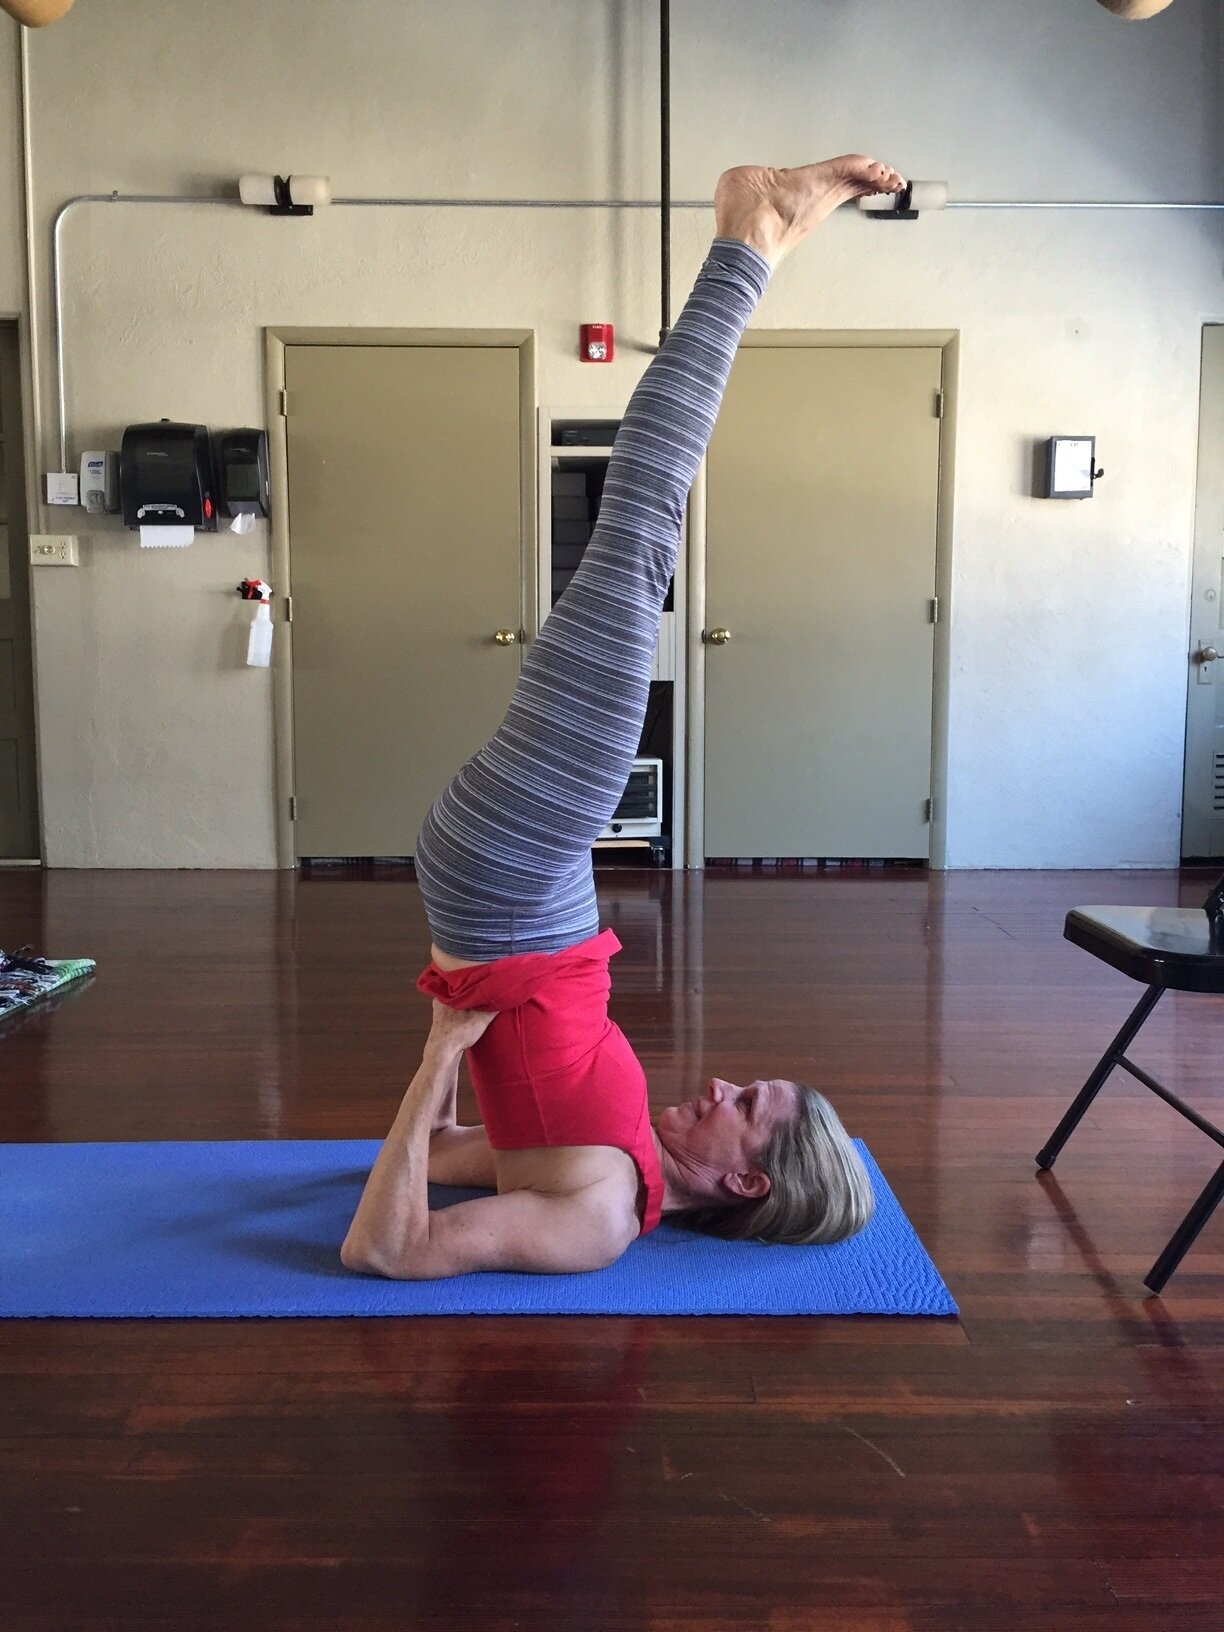
Notice the tension in my neck to get my torso to bend 90 degrees without blankets.
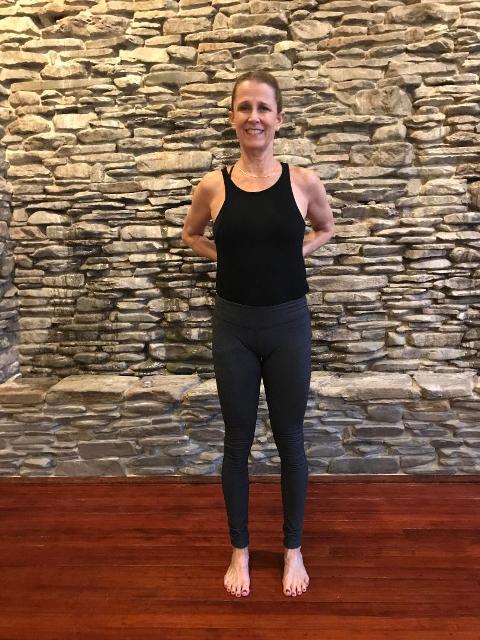
Now, if your shoulders are tight, you also need a belt. How can you tell if your shoulders are tight? Stand in front of a mirror and place your hands on your back as if you were in Shoulder Stand. There are two things to look for:
First, if you place your hands on your back as if you were doing shoulder Stand, can you draw your elbows towards each other in adduction behind your back to make your elbows invisible to yourself looking in the mirror? If not, you definitely need to belt your elbows in Shoulder Stand to keep them from winging out and to keep your pose from collapsing onto your neck and upper back.
Elbows winging out. This is why you need a belt!

Elbows hugging in. Even though I can get my elbows to hug in, I still use a belt. My body weight makes it harder to keep my elbows hugging in and over time, as I get fatigued holding the pose, my elbows will start to slide apart. A belt helps prevent that.
Second, if you look at yourself from the side, with your elbows squeezing in toward the midline, can you get your elbows as high as your shoulders without rounding your shoulders forward or bending forward; stay in Tadasna. If you cannot, your shoulders are tight in extension. See the picture titled "Upside Down" Shoulder Stand above.
There are 2 ways to go up into Shoulder Stand and put a belt on your arms: One is to go over into Plough and put a belt on your biceps at your elbow creases and the other is to go up the wall and lift your hips as if to do Bridge and then put the belt on your arms. Once the belt is on your arms, then you lift yourself all the way up into Sarvangasana. When you come down, just reverse the action. Take the belt off at the same point you put it on. Please don’t come down and lay on your arms with your elbows belted.
Getting ready to go up into Shoulder Stand. Notice my head is on the lower blanket. My neck can "feel" the edge of the two stacked blankets and my shoulders are on the sticky mat, which is about 3 or so inches back from the edge. This is so that when I roll up into Shoulder Stand, my shoulders do not roll off of the blanket stack compressing my neck. I have the belt looped (and measured to my shoulder width) over one arm. This way I can find it and put it on the other arm once I am in Plow.

Going into Plow and putting a belt on both arms. Notice that my hips are directly over my shoulders and my back is as straight as it would be in Tadasana.

Shoulder Stand, full Pose. Notice how vertical my body is. The blankets under my shoulders help me to achieve that. Also, notice how wide the blankets are. Everything from my shoulders to my elbow must be supported at the same height. My neck and head should be on blanket so they can slide and adjust. My elbows should be on mat so that they cannot slide apart. Plus the belt helps me with that, too.
Lastly, when you come down, please do not let your head whiplash forward. Use your abdominals to control the descent of your hips and keep the back of your head down on the floor. Make sure you have something under your hips so that they don't drop below the level of the blankets. That is what causes your head to pop up off the floor.
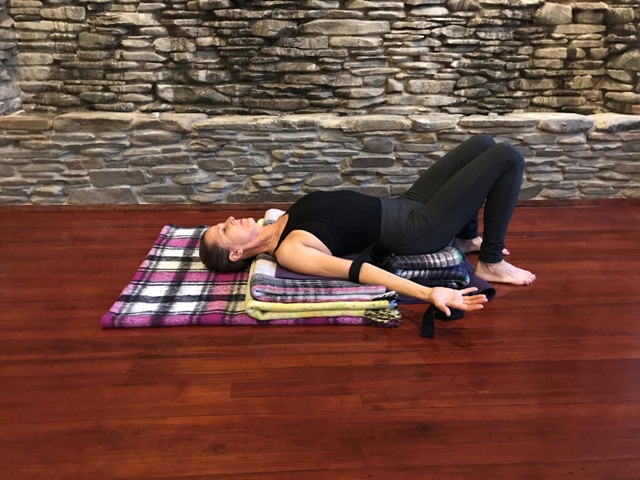
When you come down, come through Plow and take your belt off. Then unroll and stay there for a few minutes. I like to slide back so that my head, shoulders and arms are on the level of the floor and my lower back and hips are on the blanket/mat stack. You can bring your feet together into Cobbler's Pose. (I'll update this post with a picture of that, soon!) Stay here for at least 5 minutes, or finish in Savasana if you choose.
Questions? If any of this is not clear, feel free to leave a comment below. Also, if I need any other pictures to demonstrate any of these principles better, please let me know.