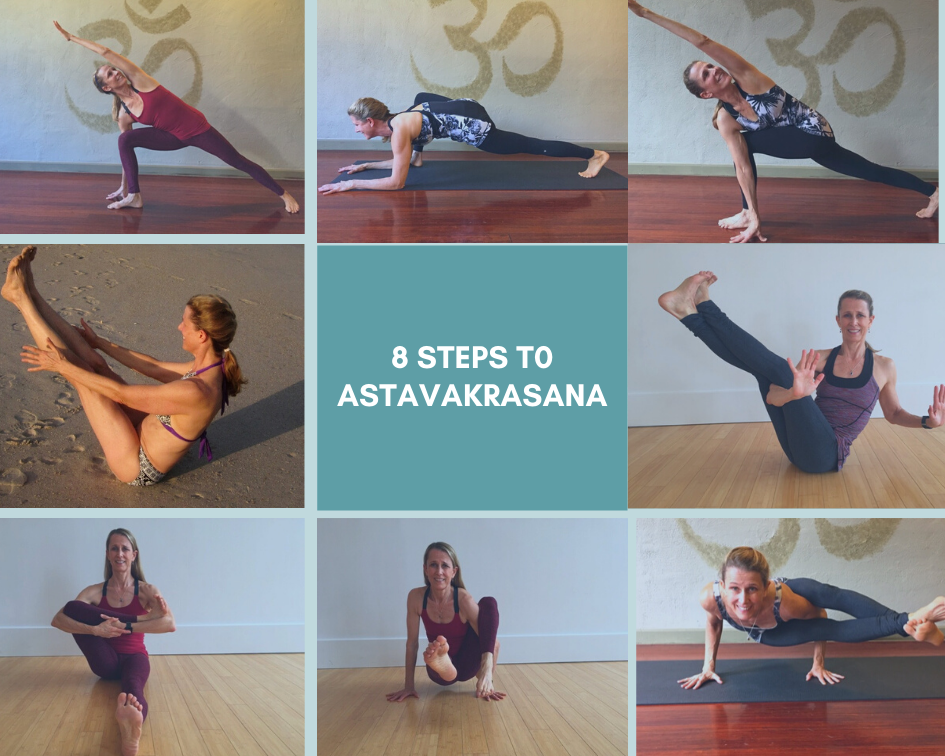


Continuing with postures in the sequence for Astavakrasana, let’s look at Lizard Lunge.
In order to be able to do Astavakrasana you have to be able to get your knee onto the back of your arm when you are in a seated position. In Lizard Lunge, you can see whether or not your shoulder is below your knee.
In this pose, the back leg is straight and the front leg bent with the shin perpendicular to the floor. If you can easily get both forearms evenly on the ground, then chances are that you have the flexibility to do Astavakrasana.
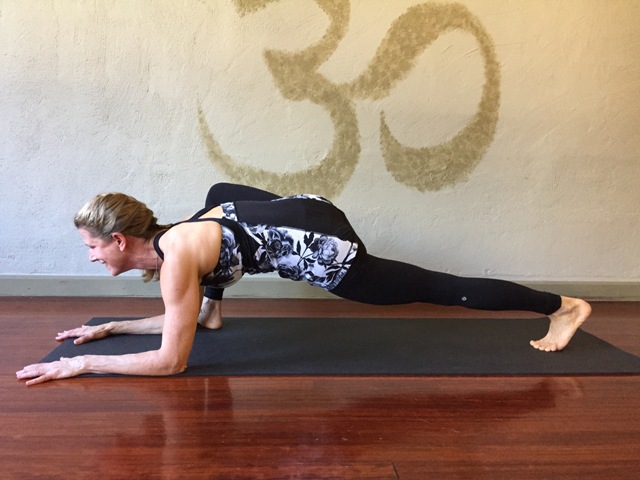
In the beginning you start with your hands on the floor,

eventually lowering your elbows to blocks and finally to the floor. It is harder to lower the inside elbow to the floor.
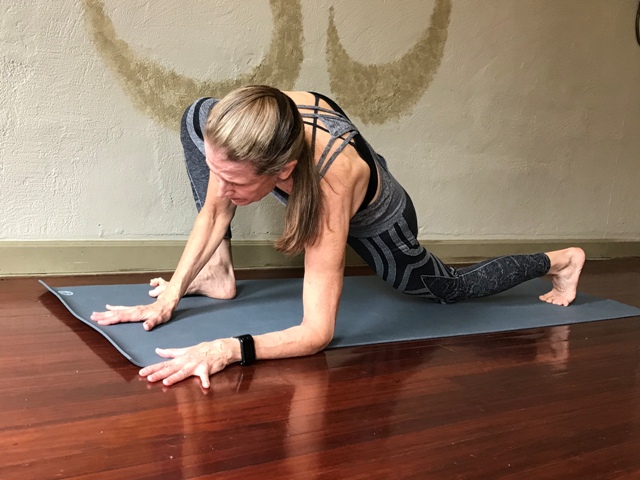
It is important to lower them both evenly. You may have to back up until you are able to achieve this. This may take a while. If you are interested in doing Astavakrasana, you might want to practice Lizard Lunge every day until you can easily get your elbows to the floor. This practice could unlock other poses for you as well such as Warrior I, Pigeon and Split.
In some of these photos, you can see that my back knee is on the floor. In the beginning, you might need to bend your back leg. Eventually, you may be able to keep the knee lifted and the back leg straight.
It is also important to maintain the length on the front body. Your torso will round if you are reaching too hard to get the elbows to the floor. Keep pressing down into the hands or forearms and lengthen your collar bones forward. Draw your shoulder blades towards each other and down your back towards your waist rather than away from each other and down towards the floor. As you would in Caturanga, don’t drop your head. Keep your neck in line with the spine and the back of your head level with your upper back.
You may be tempted to let the front ankle roll out. Some call this “Broken Pigeon”.

This often happens in the desire to get the elbows to the floor. This could be a good variation when you are working towards poses with the legs externally rotated such as Pigeon or Seated Cobbler’s Pose. But for now we are working on our ability to fold forward with one knee bent into our chest as in Marichyasana I.

For this pose, I prefer keeping the weight pressing down onto the inner edge of the foot and keeping the ankle straight. If you need some play, it is better to let the knee and foot rotate out a few degrees, but I would only do this if I could not get my hands to the floor, not to get my elbows to the floor. Be patient. Don’t force the stretch.

The next step would be to come into Eka Hasta Bhujasana, or One Arm Leg Pressure Pose.

And from there into Astavakrasana

Continuing with postures in the sequence for Astavakrasana, let’s look at Lizard Lunge.In order to be able to do Astavakrasana you have to be able to get your knee onto the back of your arm when you are in a seated position. In Lizard Lunge, you can see whether or not your shoulder is below your knee. In this pose, the back leg is straight and the front leg bent with the shin perpendicular to the floor. If you can easily get both forearms evenly on the ground, then chances are that you have the flexibility to do Astavakrasana.In the beginning you start with your hands on the floor, eventually lowering your elbows to blocks and finally to the floor. It is harder to lower the inside elbow to the floor. It is important to lower them both evenly. You may have to back up until you are able to achieve this. This may take a while. If you are interested in doing Astavakrasana, you might want to practice Lizard Lunge every day until you can easily get your elbows to the floor. This practice could unlock other poses for you as well such as Warrior I, Pigeon and Split. In some of these photos, you can see that my back knee is on the floor. In the beginning, you might need to bend your back leg. Eventually, you may be able to keep the knee lifted and the back leg straight. It is also important to maintain the length on the front body. Your torso will round if you are reaching too hard to get the elbows to the floor. Keep pressing down into the hands or forearms and lengthen your collar bones forward. Draw your shoulder blades towards each other and down your back towards your waist rather than away from each other and down towards the floor. As you would in Caturanga, don’t drop your head. Keep your neck in line with the spine and the back of your head level with your upper back.You may be tempted to let the front ankle roll out. Some call this “Broken Pigeon”.This often happens in the desire to get the elbows to the floor. This could be a good variation when you are working towards poses with the legs externally rotated such as Pigeon or Seated Cobbler’s Pose. But for now we are working on our ability to fold forward with one knee bent into our chest as in Marichyasana I.For this pose, I prefer keeping the weight pressing down onto the inner edge of the foot and keeping the ankle straight. If you need some play, it is better to let the knee and foot rotate out a few degrees, but I would only do this if I could not get my hands to the floor, not to get my elbows to the floor. Be patient. Don’t force the stretch.The next step would be to come into Eka Hasta Bhujasana, or One Arm Leg Pressure Pose. And from there into Astavakrasana